vasile eugen Postat Februarie 10, 2015 Partajează Postat Februarie 10, 2015 Saluare.Sunt la inceput de drum cu acest sistem de dzvoltare.Am achizitionat un Arduino uno R3 impreuna cu displaiul amintit in titlu.Am incercat coduri din saitul:http://nicuflorica.blogspot.ro/search?updated-min=2014-01-01T00:00:00%2B02:00&updated-max=2015-01-01T00:00:00%2B02:00&max-results=50 Dar nimic.Am incercat sa fac din programe gasite si in forma copy/paste dar imi dadea erori la compilare.Am descarcat si librari si le-am pus in fisierul librari de la arduino dar nimic.Ma poate ajuta cineva cu un cod pentru atesta TFT-ul?Pe display 2*16 caractere am facut teste si este OK. Link spre comentariu
nico_2010 Postat Februarie 10, 2015 Partajează Postat Februarie 10, 2015 Incearca te rog aceasta librarie. TFT.rar Link spre comentariu
vasile eugen Postat Februarie 10, 2015 Autor Partajează Postat Februarie 10, 2015 Incearca te rog aceasta librarie. Nu merg .La compilare imi da erori. Link spre comentariu
nico_2010 Postat Februarie 11, 2015 Partajează Postat Februarie 11, 2015 Nu merg .La compilare imi da erori. Ciudat, mie imi functioneaza libraria. Cum ai instalat-o? inca o librarie (chiar daca este pentru 2.6 inch merge) 2-6 inch touch tft libraries.rar Link spre comentariu
nico_2010 Postat Februarie 11, 2015 Partajează Postat Februarie 11, 2015 Acum am testat aceasta librarie si functioneaza. Programul de test functioneaza, de asemenea. Adafruit_TFTLCD.rar graphicstest.rar Link spre comentariu
vasile eugen Postat Februarie 11, 2015 Autor Partajează Postat Februarie 11, 2015 Tot nu merge .Eroare in continuare. Acest cod imi compileaza: // Touch screen library with X Y and Z (pressure) readings as well // as oversampling to avoid 'bouncing' // This demo code returns raw readings, public domain #include <stdint.h> #include "TouchScreen.h" #define YP A2 // must be an analog pin, use "An" notation! #define XM A3 // must be an analog pin, use "An" notation! #define YM 8 // can be a digital pin #define XP 9 // can be a digital pin // For better pressure precision, we need to know the resistance // between X+ and X- Use any multimeter to read it // For the one we're using, its 300 ohms across the X plate TouchScreen ts = TouchScreen(XP, YP, XM, YM, 300); void setup(void) { Serial.begin(9600); } void loop(void) { // a point object holds x y and z coordinates Point p = ts.getPoint(); // we have some minimum pressure we consider 'valid' // pressure of 0 means no pressing! if (p.z > ts.pressureThreshhold) { Serial.print("X = "); Serial.print(p.x); Serial.print("tY = "); Serial.print(p.y); Serial.print("tPressure = "); Serial.println(p.z); } delay(100); } si acesta dar nu este pentru tft-ul care il detin: /* Arduino TFT Bitmap Logo example This example reads an image file from a micro-SD card and draws it on the screen, at random locations. In this sketch, the Arduino logo is read from a micro-SD card. There is a .bmp file included with this sketch. - open the sketch folder (Ctrl-K or Cmd-K) - copy the "arduino.bmp" file to a micro-SD - put the SD into the SD slot of the Arduino TFT module. This example code is in the public domain. Created 19 April 2013 by Enrico Gueli http://arduino.cc/en/Tutorial/TFTBitmapLogo */ // include the necessary libraries #include <SPI.h> #include <SD.h> #include <TFT.h> // Arduino LCD library // pin definition for the Uno #define sd_cs 4 #define lcd_cs 10 #define dc 9 #define rst 8 // pin definition for the Leonardo //#define sd_cs 8 //#define lcd_cs 7 //#define dc 0 //#define rst 1 TFT TFTscreen = TFT(lcd_cs, dc, rst); // this variable represents the image to be drawn on screen PImage logo; void setup() { // initialize the GLCD and show a message // asking the user to open the serial line TFTscreen.begin(); TFTscreen.background(255, 255, 255); TFTscreen.stroke(0, 0, 255); TFTscreen.println(); TFTscreen.println(F("Arduino TFT Bitmap Example")); TFTscreen.stroke(0, 0, 0); TFTscreen.println(F("Open serial monitor")); TFTscreen.println(F("to run the sketch")); // initialize the serial port: it will be used to // print some diagnostic info Serial.begin(9600); while (!Serial) { // wait for serial line to be ready } // clear the GLCD screen before starting TFTscreen.background(255, 255, 255); // try to access the SD card. If that fails (e.g. // no card present), the setup process will stop. Serial.print(F("Initializing SD card...")); if (!SD.begin(sd_cs)) { Serial.println(F("failed!")); return; } Serial.println(F("OK!")); // initialize and clear the GLCD screen TFTscreen.begin(); TFTscreen.background(255, 255, 255); // now that the SD card can be access, try to load the // image file. logo = TFTscreen.loadImage("arduino.bmp"); if (!logo.isValid()) { Serial.println(F("error while loading arduino.bmp")); } } void loop() { // don't do anything if the image wasn't loaded correctly. if (logo.isValid() == false) { return; } Serial.println(F("drawing image")); // get a random location where to draw the image. // To avoid the image to be draw outside the screen, // take into account the image size. int x = random(TFTscreen.width() - logo.width()); int y = random(TFTscreen.height() - logo.height()); // draw the image to the screen TFTscreen.image(logo, x, y); // wait a little bit before drawing again delay(1500); } Link spre comentariu
nico_2010 Postat Februarie 11, 2015 Partajează Postat Februarie 11, 2015 In mesaj am mentionat ca tftpaint nu functioneaza. Link spre comentariu
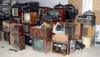
nico_2010 Postat Februarie 13, 2015 Partajează Postat Februarie 13, 2015 In atasament gasiti o alta versiune functionala (inclusiv partea de touchscreen) In imagine Arduino in functiune cu programul tftpaint_azi.pde SWTFT.rar tftpaint_azi.rar Link spre comentariu
vasile eugen Postat Februarie 13, 2015 Autor Partajează Postat Februarie 13, 2015 Salut .Da intradevar functioneaza .Ce am reusit sa testez sunt aici pe pagina:https://www.facebook.com/vonutan Link spre comentariu

Postări Recomandate
Creează un cont sau autentifică-te pentru a adăuga comentariu
Trebuie să fi un membru pentru a putea lăsa un comentariu.
Creează un cont
Înregistrează-te pentru un nou cont în comunitatea nostră. Este simplu!
Înregistrează un nou contAutentificare
Ai deja un cont? Autentifică-te aici.
Autentifică-te acum